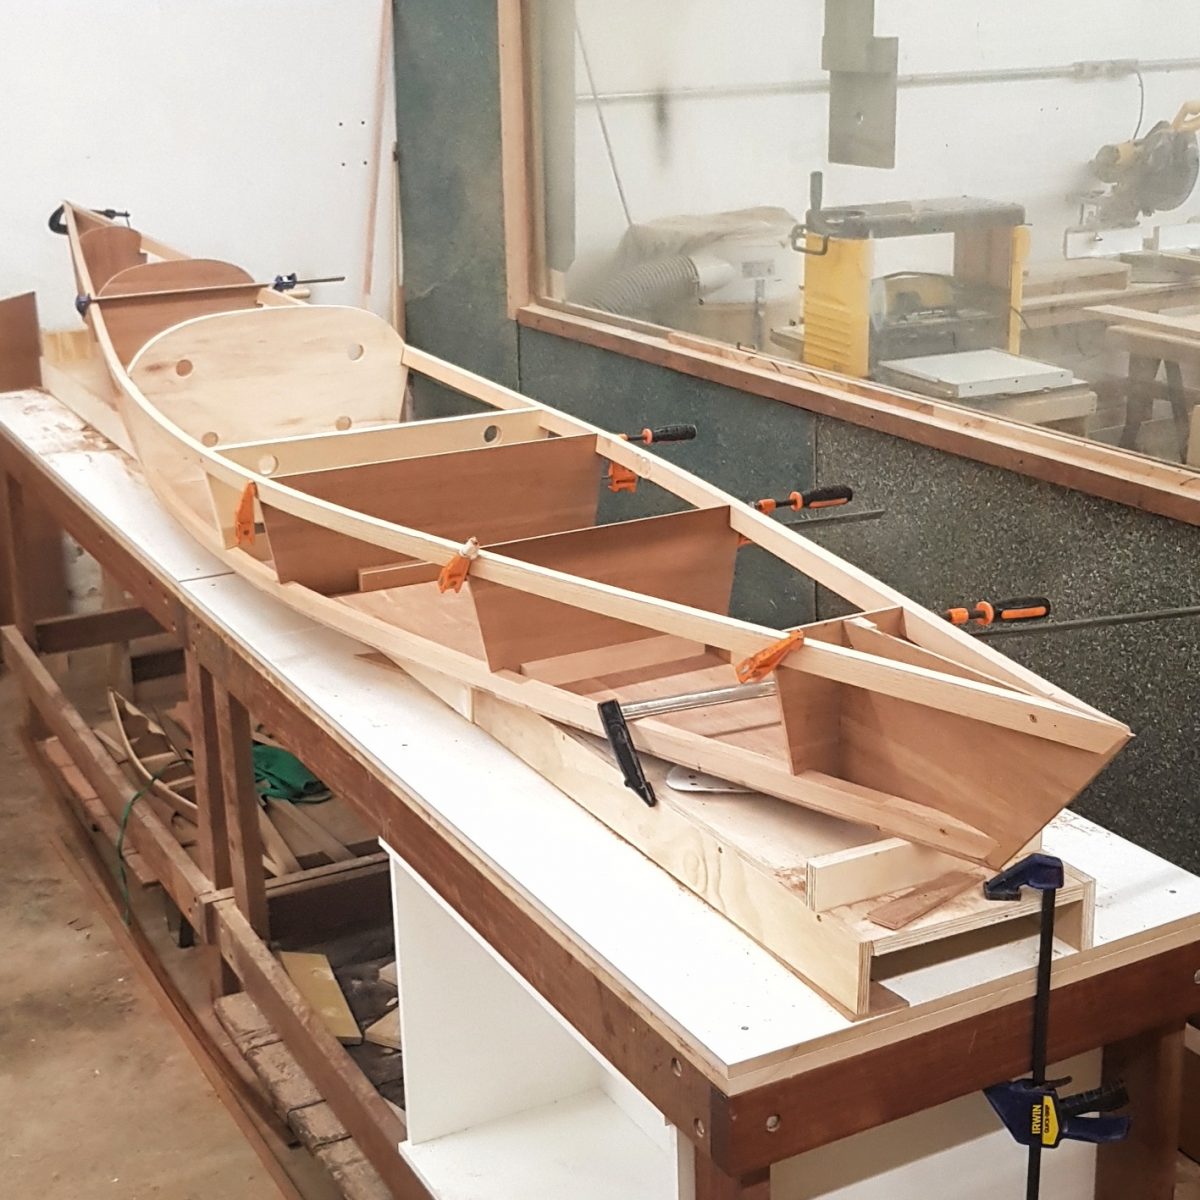
Crafting a Wooden Canoe from Scratch: A Comprehensive Guide
Embarking on the journey of crafting a wooden canoe is an endeavor that demands patience, skill, and a deep appreciation for the artistry of woodworking. This comprehensive guide provides a detailed roadmap for constructing your own canoe, from initial planning to the final varnish.
Phase 1: Design and Planning
Choosing the Right Canoe Design
The first step is to select a canoe design that aligns with your intended use and skill level. Consider factors such as:
- Length: Longer canoes offer greater stability and speed but are less maneuverable. Shorter canoes are more agile but can be less stable.
- Width: Wider canoes provide greater stability, but can be less efficient in paddling.
- Depth: Deeper canoes offer more carrying capacity and stability but can be less responsive to paddling.
- Material: Cedar is a classic choice for canoes, known for its lightweight, rot-resistant properties and beautiful aroma. Other suitable woods include spruce, pine, and mahogany.
Explore canoe plans online, in woodworking books, or consult experienced canoe builders.
Gathering Materials and Tools
Once you have a chosen design, compile the necessary materials and tools:
- Wood: Purchase high-quality, kiln-dried lumber in accordance with the plan specifications.
- Construction adhesives: Use a waterproof, epoxy-based adhesive for maximum strength and durability.
- Fasteners: Galvanized nails, screws, or copper rivets can be used for securing the canoe's structural components.
- Canvas or fiberglass: These materials provide additional strength and watertightness for the canoe's hull.
- Epoxy resin and hardener: Used for sealing and coating the hull.
- Woodworking tools: Essential tools include a circular saw, jigsaw, hand planes, chisels, clamps, sanding tools, and measuring instruments.
Phase 2: Construction
1. Building the Frames
Start by constructing the canoe's frames. Carefully cut and shape the wood according to the plan, ensuring precise angles and measurements. Use jigs or templates for accuracy. Secure the frames together with epoxy and fasteners, allowing the adhesive to cure fully before proceeding.
2. Attaching the Planks
The planking process involves carefully fitting and attaching thin wooden strips, called planking, to the frames. This step requires meticulous attention to detail, as any gaps or imperfections can weaken the canoe.- Steaming: If using narrow planks, they may need to be steamed to bend them around the curves of the hull. This process involves exposing the wood to steam until it becomes pliable.
- Plank Attachment: Attach planks to the frames using epoxy and fasteners. Ensure even spacing and consistent overlap for structural integrity.
3. Adding the Decks and Seat Supports
Once the planking is complete, build the decks (bow and stern), and seat supports. These components provide structure, strength, and seating areas.
4. Finishing the Hull
The hull requires careful sanding and shaping to achieve a smooth, watertight surface. Use progressively finer grit sandpaper to remove any rough spots or imperfections. Once satisfied with the finish, apply a coat of epoxy resin to seal the hull and protect it from water damage.
5. Canvas or Fiberglass Coating
To further enhance the strength and watertightness, apply canvas or fiberglass cloth over the epoxy-coated hull. This process involves layering the material with additional epoxy resin, ensuring thorough saturation for maximum adhesion.
Phase 3: Finishing Touches
1. Painting and Varnishing
After the canvas or fiberglass has cured, paint the canoe with your desired color scheme. This step involves preparing the surface for painting, applying primer, and then applying several coats of high-quality marine paint.
Finally, protect the painted surface with a layer of marine varnish. This step requires multiple thin coats for a durable finish.
2. Adding Oar Locks and Hardware
Install oar locks and any necessary hardware, such as carrying handles, tie-down points, or a bow compass. Ensure that all hardware is securely mounted for safety and functionality.
Phase 4: Launching and Enjoying Your Canoe
After completing the final steps, it's time to launch your new canoe and enjoy the fruits of your labor. Take the time to test its performance in calm waters before venturing out into more challenging conditions.
Building a wooden canoe is an enriching and fulfilling experience. By following this guide meticulously, you can create a beautiful and functional vessel that you can cherish for years to come. Remember, patience, attention to detail, and a passion for woodworking are key to success.
0 comments:
Post a Comment
Note: Only a member of this blog may post a comment.